Overview
With the Microsoft Power BI Output Tool, users can capture the power of Alteryx’s Analytical Processing Automation (“APA”) and Extract, Transform, and Load (“ETL”) capabilities and pair them with the immersive dashboards and reports generated in Microsoft Power BI. Transform your custom-built Alteryx Workflows into dynamic visualizations when posting to the Microsoft Power BI Service using this step-by-step guide!
Setting Up Microsoft Power BI
Prior to launching Alteryx, ensure that you have access to Microsoft Power BI Service (app.powerbi.com) via a Power BI Pro or Power BI Premium license and have your login credentials ready. If you do not have access to Microsoft Power BI Service, use this link to start a free trial. Once your account is created, you will be able to access the Microsoft Power BI Service.
Downloading the Microsoft Power BI Output Tool
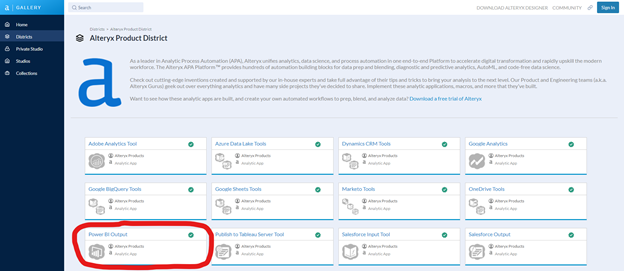
The Microsoft Power BI Output Tool does not come installed with a standard download of the Alteryx Designer platform. To install the Microsoft Power BI Output Tool, use this link to download the Power BI .yxi file from the Alteryx Analytics Gallery.

Run the Power BI Output Gallery Workflow to download the tool by:
- Selecting Run
- Selecting Run, again
- Clicking the link to download the release that corresponds to your version of Alteryx Designer (note that the remaining instructions will be for Power BI Output v3.0.0)
Once you have the Power BI Output package downloaded, launch the Alteryx Tool Installer by clicking on the download. Follow the remaining install prompts and navigate to the “Connectors” Tool Palette group to confirm the installation was successful (users may need to close all instances of Alteryx and relaunch the program for the tool to populate).
Deploying the Microsoft Power BI Output Tool

Once you have the Microsoft Power BI Output Tool installed for Alteryx Designer, build a new workflow or open an existing workflow that you would like to convert for visualization in Power BI. At the end of your workflow, instead of connecting the final tool to an Output Data Tool, drag and drop in the Power BI Output tool from the “Connectors” Tool Palette.

Configuring the Microsoft Power BI Output Tool
Connect to the Microsoft Power BI Service by signing into your account via the internet browser prompt. Your initial login will require granting permission to Alteryx to access your Microsoft account information. Once your connection is successful, you are able to configure the tool to create a new data set or update an existing data set in each of your Workspaces.
Once you have selected your Workspace and Dataset, toggle to the Options tab in the Configuration pane for:
- New Datasets
- Create the Dataset Name
- Create the Table Name
- Updates to Existing Datasets
- Determine Existing File Action (Append or Overwrite)
- Select Table Mapping
After you have configured the Power BI Output Tool, launch Microsoft Power BI Service and design your own interactive dashboard, chart, or visualization using your Alteryx processed dataset.
Bonus: Integrating Your Process with Alteryx Server
If you have an Alteryx Workflow that generates data for a Microsoft Power BI visualization, consider deploying your workflow to the Alteryx Gallery and setting automatic updates using the Scheduler functionality. See this link for more details. Once you have your workflow scheduled in Alteryx Gallery, sit back and enjoy the automatically refreshed data in your Microsoft Power BI visualization without ever having to touch a button!
