What is RPA?
Robotic Process Automation (RPA) lets you program bots to complete business processes or tasks. The Automation Anywhere RPA Client allows users to program bots without any programming knowledge and is one of the most popular RPA clients. Automation Anywhere allows users to monitor and schedule bots remotely via the Control Room and can analyze the uses of bots via Bot Insight. The IQ Bot application of Automation Anywhere uses machine learning to program bots. You can also download bots that other people have created by going to the Bot Store. With the Automation Anywhere RPA Client, minimal coding knowledge is required but it can be helpful when designing tasks.
How to Set Up Automation Anywhere RPA Client – Community Edition
First, sign up for the Automation Anywhere Community Edition here. Once you sign up, you will receive an email containing your Control Room URL, username, and password. Click on the Control Room link and log in using the username and password provided in the email.
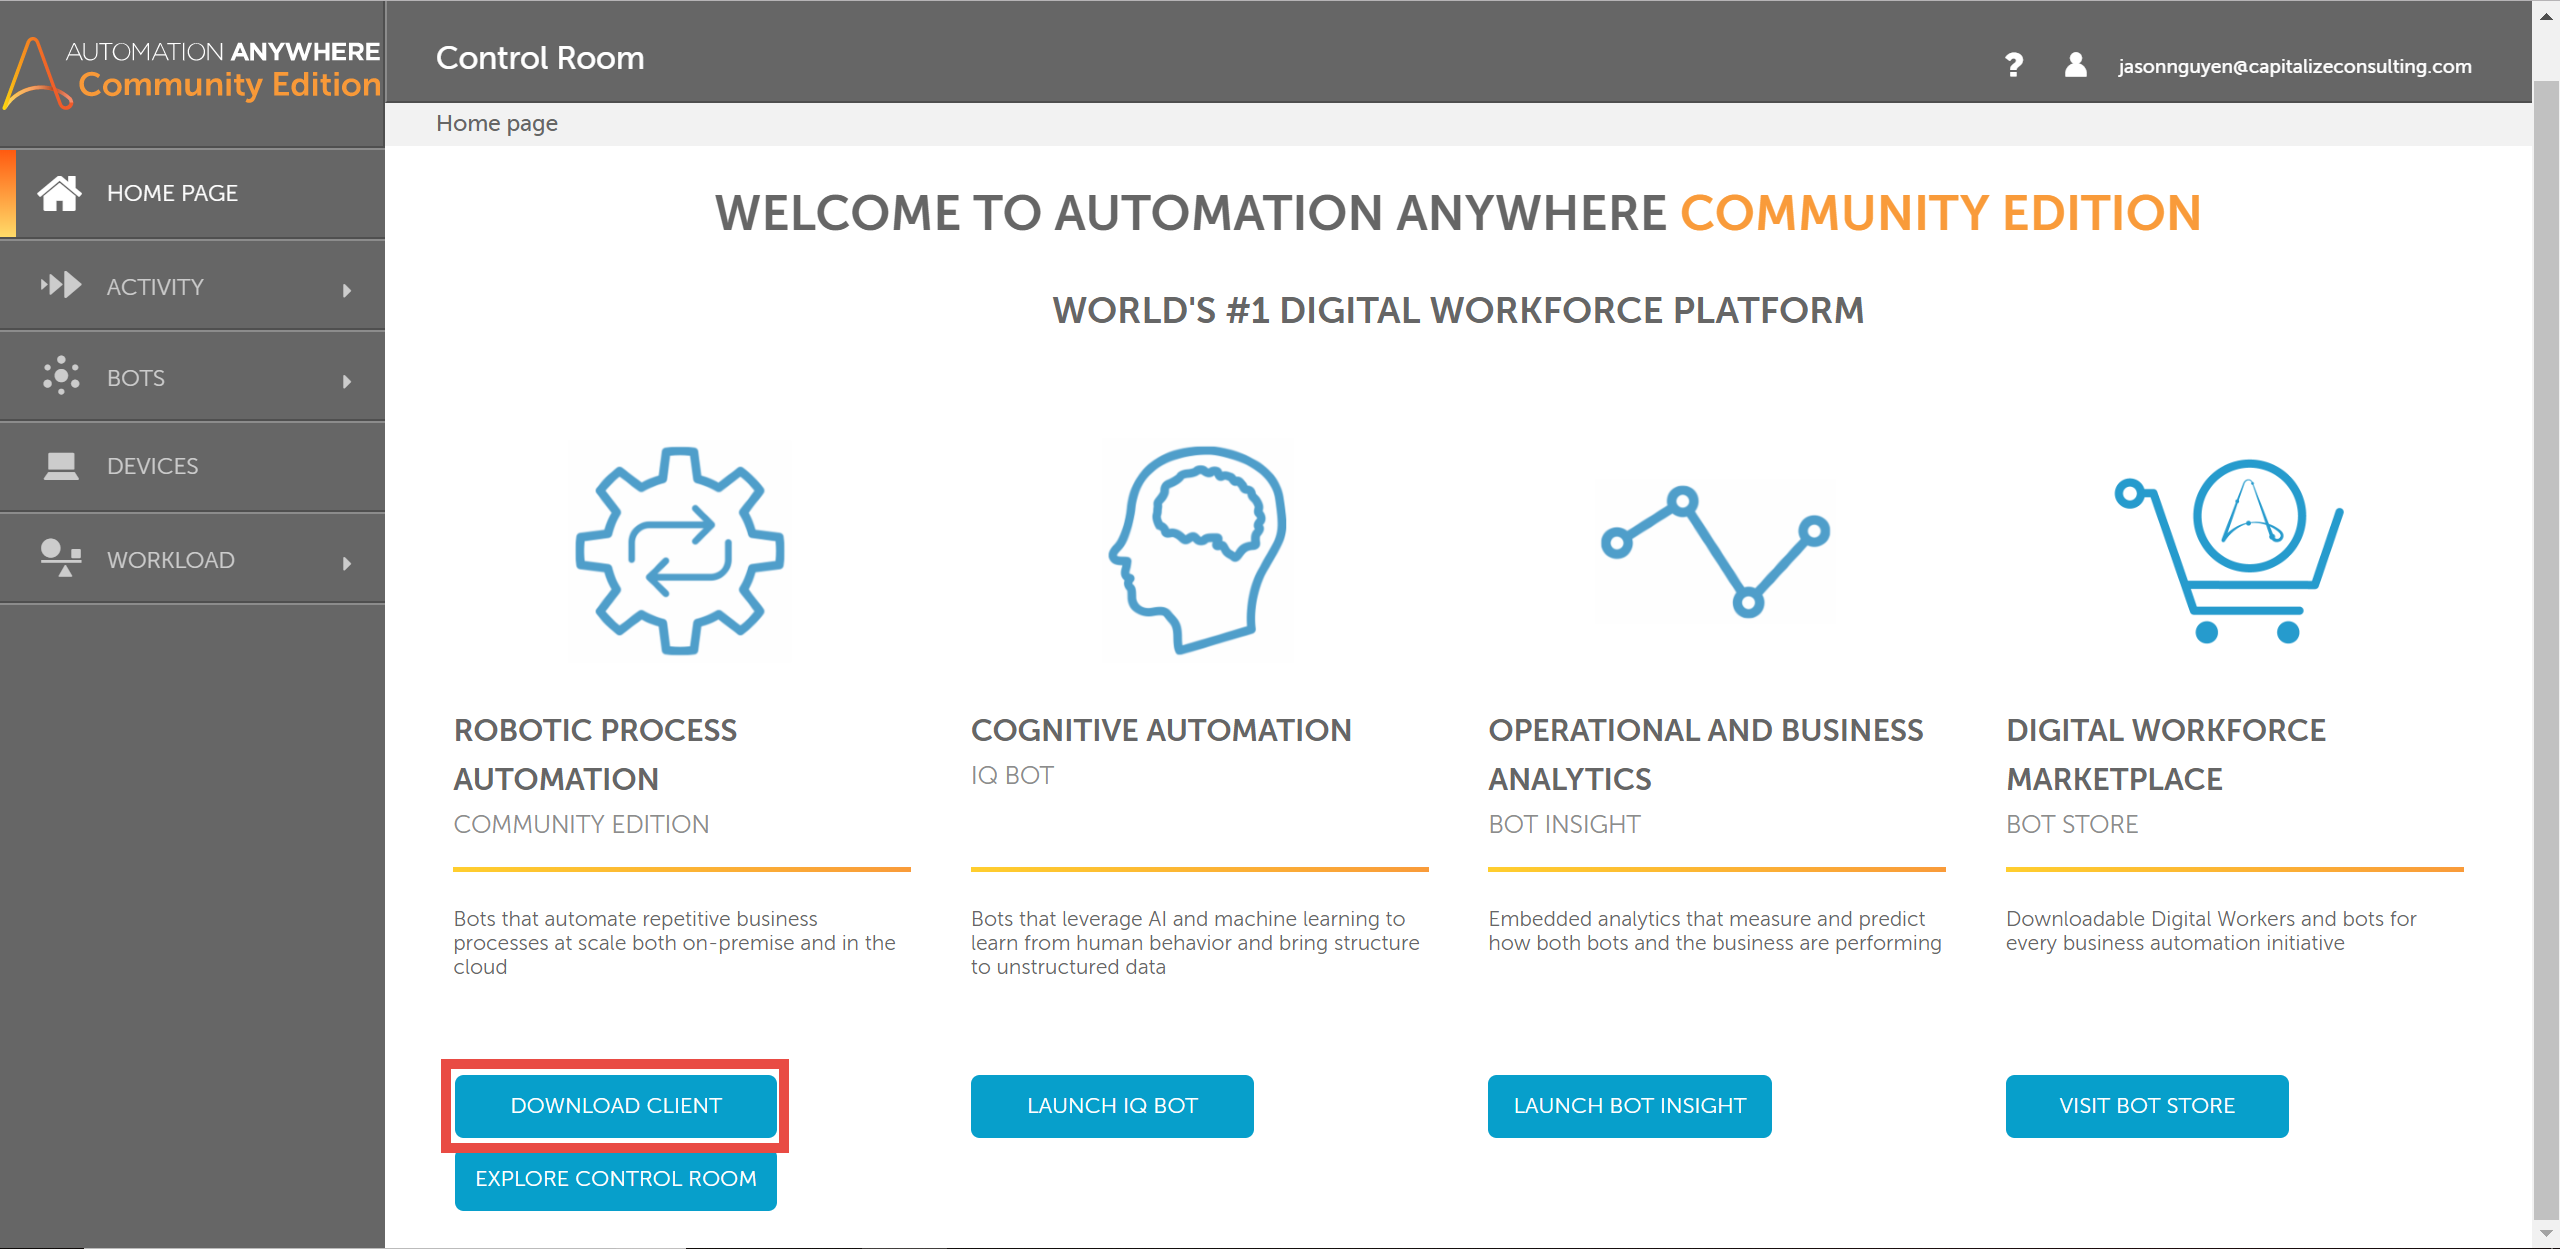
From the Control Room, you can download the RPA client, schedule bots to run, view bot activity, or launch the other Automation Anywhere apps. This document will only focus on the RPA client.
RPA Client
Once the client is downloaded from the Control Room, you can log in using the credentials sent to you when you signed up for Automation Anywhere. In the client, on the left side of the screen, under “Automate,” you can view your saved bots, metabots, and workflows, as well as visit the bot store. Under “Manage,” you can view your bot repositories, scheduled bots, triggers, and reports. In the bar at the top of the client, you can create a new bot, start a new recording, run or edit a selected bot, or view an estimated return on investment (ROI) gained from using Automation Anywhere bots. The ROI estimate is calculated using an annual salary and the amount of time saved by using the bots rather than doing the tasks by hand.

Tasks/Bots
To create a new bot, click “New,” then click on “Workbench.” This opens the Bot Creator window, shown below.
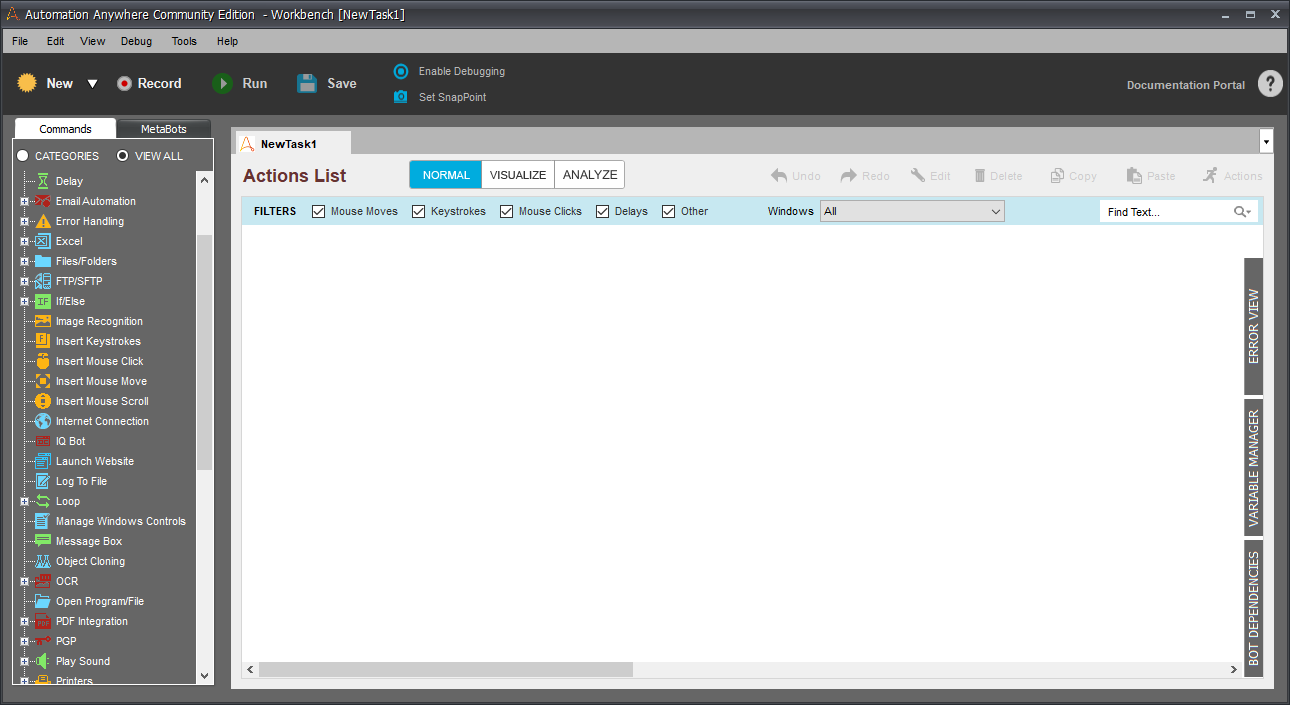
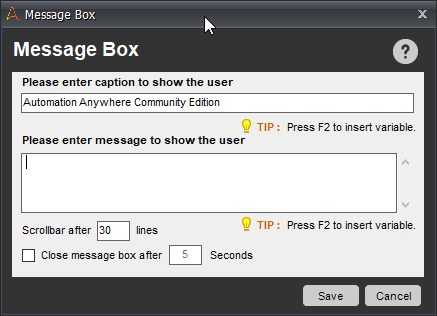
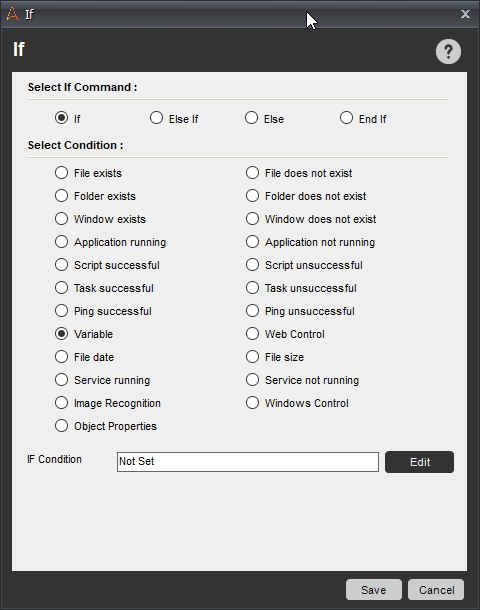
Here you can add commands to your bot by double-clicking or dragging them into the Actions List. Commands that can be included in the bots include loops, keystrokes, clicks, reading Excel or csv files, opening apps, and handling errors among others. When a command is added to the Actions List, its configuration window will appear. Examples of different configuration windows are shown below. If you need to edit a command after adding it to the Action List, double-clicking the command will reopen the configuration window.

You can also record actions by clicking on “Record.” This allows your bot to perform tasks such as clicking on web objects, opening menus, etc. There are 3 types of recorders: Smart Recorder, Screen Recorder, and Web Recorder. The Smart Recorder is the most versatile of the recorders, as it allows the bot to recognize objects in many different apps, while the Web Recorder is limited to Internet Explorer and the Screen Recorder requires the same screen size/resolution to be set as it was recorded. Actions performed by these recorders can be set by coordinates, objects, or images, although the Automation Anywhere RPA client cannot recognize objects in every application. Once the recording is complete, the client will add a list of commands that correspond to the actions done when recording to the actions list. Additionally, variables can be created and edited using the Variable Manager tab on the right-hand side of the screen. These variables can be used in many of the commands, such as Keystrokes and Object Cloning, by pressing F2 when configuring a command. Variable values can be set when they are created or by using the Variable Operation command, which is useful if the variable changes values during the task.
Metabots
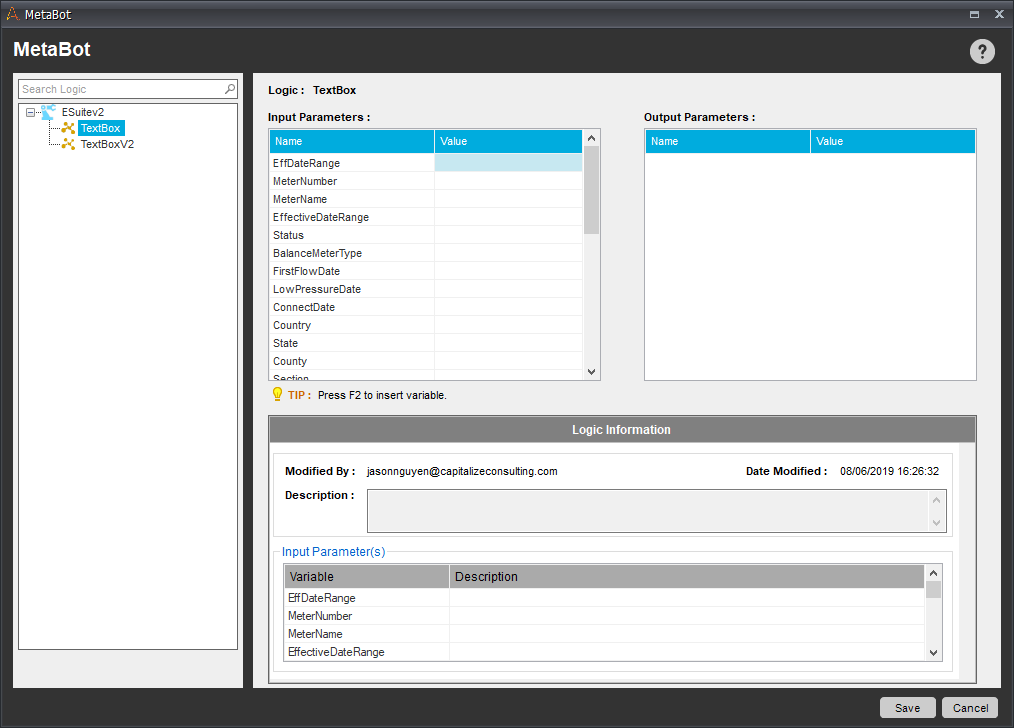
Metabots are another feature of the Automation Anywhere RPA Client, and are essentially the building blocks of bots. They can be used by any bot, similarly to a command, by clicking on the Metabot tab in the workbench. When a metabot is changed, the change is automatically applied to every bot that utilizes it. To create a new metabot, click on the “Metabot” tab under “Automation” in the AA Client, then click “New.” This will open the Metabot Designer, which is used to configure a metabot. From here, you can add assets, which capture objects in a window for later use. Assets captured are done using standard or OCR capture types. Once assets are added to a metabot, logic must be added. Metabot logic is a list of commands that are performed on the captured assets. When a metabot is added to a task, the window below pops up, allowing you to select the values of the metabot variables.
Once the metabot is added to the task, any changes made in the metabot will carry over to every task that the metabot is included in.
Helpful Tips
- Make sure screen resolution is set to 100%. If it isn’t, then any recordings/screens might not be fully captured.
- If F2 does not pull up the variable selection window, try pressing Fn+F2 instead. For example, my F2 button lowers my computer’s volume, so I have to press Fn+F2 to open the variable selection window.
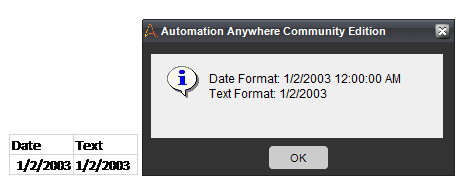
- If you are pulling from an Excel column with dates, make sure the number formatting is set to “Text” rather than “Date.” Otherwise, the data will be copied as both a date and time. The following shows how the same data is copied from an Excel sheet. The only difference between the two is the number formatting, and both entries look the same in Excel.
- When using a recorder, you may have to manually add delay or wait commands to prevent the bot from going too quickly. For example, the bot may try to click a link before a webpage has finished loading, causing the bot to click on the wrong link or to get stuck. This is especially useful when your connection or loading speeds vary, such as when using Citrix receiver.
- In a metabot, you can double click an asset to see which objects were captured. It is important to check this before building the metabot logic, as some objects may not be captured correctly. If this happens, you can use a different capture type or create custom objects within the asset. The metabot will detect custom objects via image recognition, so this might not be useful for generic objects that were not captured, like text boxes.
- Using [TAB] keystrokes is a good way to enter information into textboxes that might not be picked up as objects.
More Resources to Get You Started
There are several free courses here. Many of them are geared towards specific users, but the Bot Developer course is very helpful when getting used to the tools and contains much of the information required for the Automation Anywhere Advanced RPA Professional certificate (v11).
For more information contact Marketing@capitalizeconsulting.com